Retool User Guide
The Retool User Guide enables users to manage and update product and biller mappings, as well as upload configuration files to the Electrum Console. In addition, this page outlines the necessary steps for managing and uploading configuration files and mappings using Retool.
The Configure tab in the Electrum Console and Retool are used consecutively. Retool is used for ongoing management of those configured products and billers. You use Configure (Config App) to deploy the catalogue to the environment. For more details on the Config App feature, refer to the Configure page in the Electrum Console help guide.
Overview of Retool and Mappings
Retool simplifies the management and generation of a catalogue and its configuration files through a user-friendly interface. Electrum helps you by setting up your catalogue in Retool. This catalogue details all products, their associated codes, and mapping information—specifically, where a single product uses distinct client and service provider product codes. The Electrum catalogue requires specific output configuration files, which can be either JSON or CSV format. These are generated from Retool. These output files are then uploaded via configure on the Electrum Console. Once approved, the new catalogue is live.
Retool has three key functions:
Product/Biller Management: This feature serves as the central place to maintain the list of products (e.g., airtime, digital vouchers) and billers that your system supports.
Management of Mapping: This feature enables you to map your unique product/biller identifiers to the corresponding identifiers used by the service provider. This translation ensures Electrum processes transactions correctly.
File Generation: Retool generates the required configuration files (JSON and CSV) for catalogue management.
For more details about the various features, refer to the different types of catalogues in the section below.
Different types of catalogues
You can use Retool to manage the following features:
Add and update products or billers
This process explains how to create a new product mapping.
Add a new mapping row (in Retool)
Log in to your client-specific Retool account.
Locate the product catalogue table within the application interface.
To add a new mapping, click the 'add a new row plus (+)' button on the bottom right of the table:
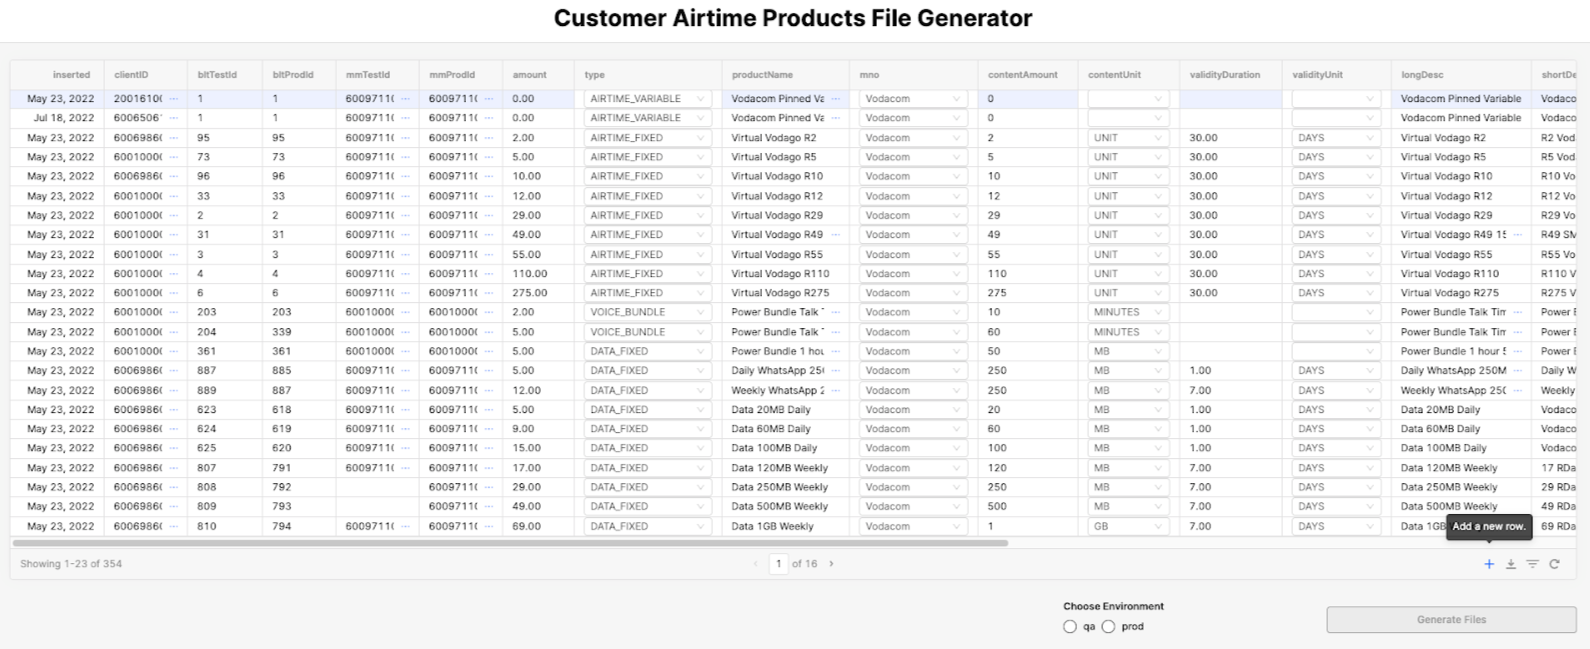
- A blank row appears at the bottom of the screen.
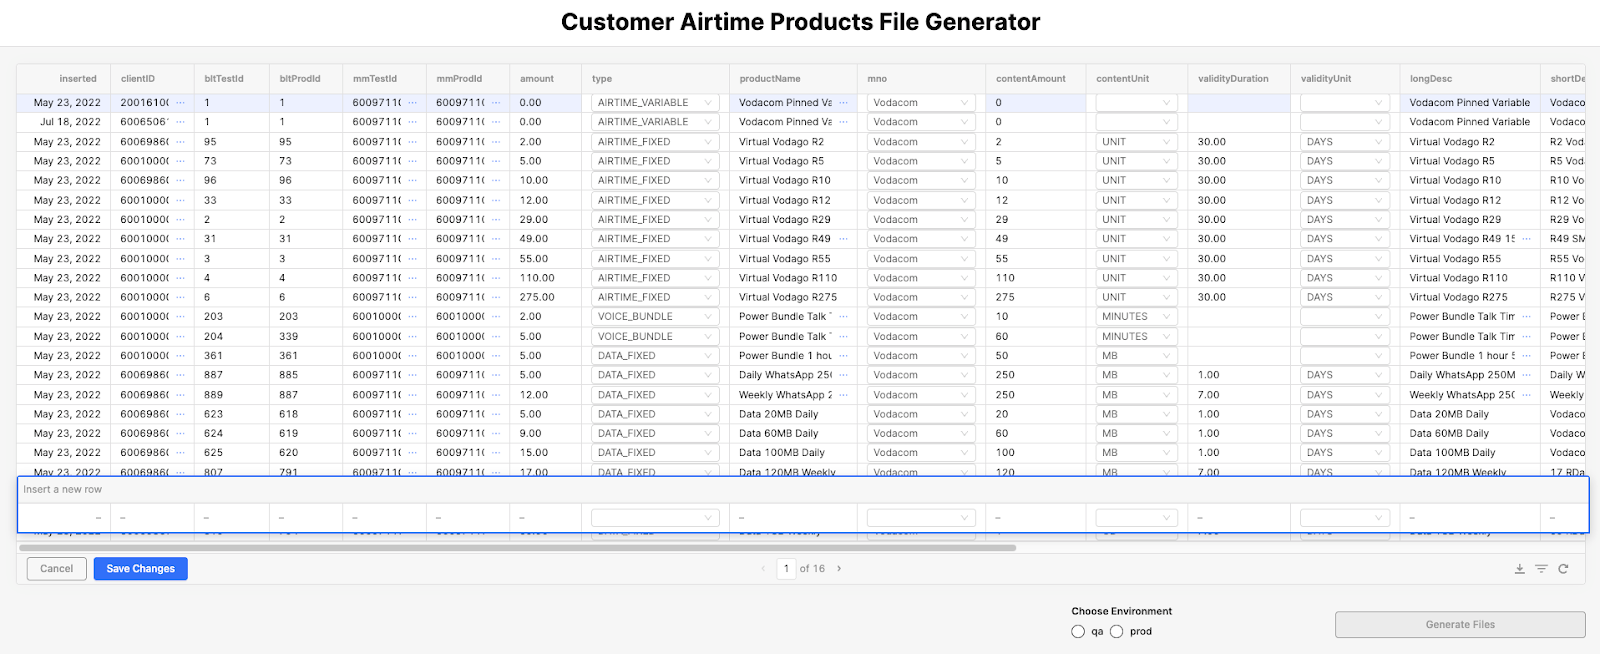
- Next, populate the fields for the new product or the new biller using the information provided by the service provider's product catalogue or biller list.
Add the Product ID
- Populate the columns, such as
clientId,bitTestId,bitProdId,mmTestId, andmmProdId, with the product/biller ID your system uses. Accurately map this ID to the one the service provider uses to uniquely identify the same entity.

The ProductID used for testing in your system may not always match the exact product name, as the specific service provider sets up the test ProductID.
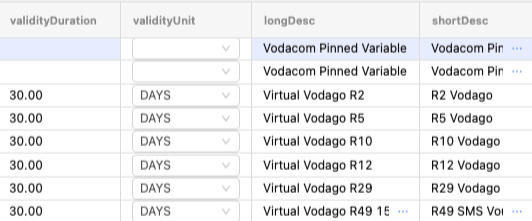
Fill the remaining columns
- Populate the remaining columns to match the information specified by the customer. Ensure that the product amounts, descriptions, and validity match the provided information. These columns include
validityDuration,validityUnit,longDesc, andshortDesc.
Using Retool to make Catalogue changes
This section explains how to edit or add products and billers within the Retool interface.
Setting up the environment
To determine which environment a mapping is active for, you must specify TRUE/FALSE in the corresponding environment fields. See image below:
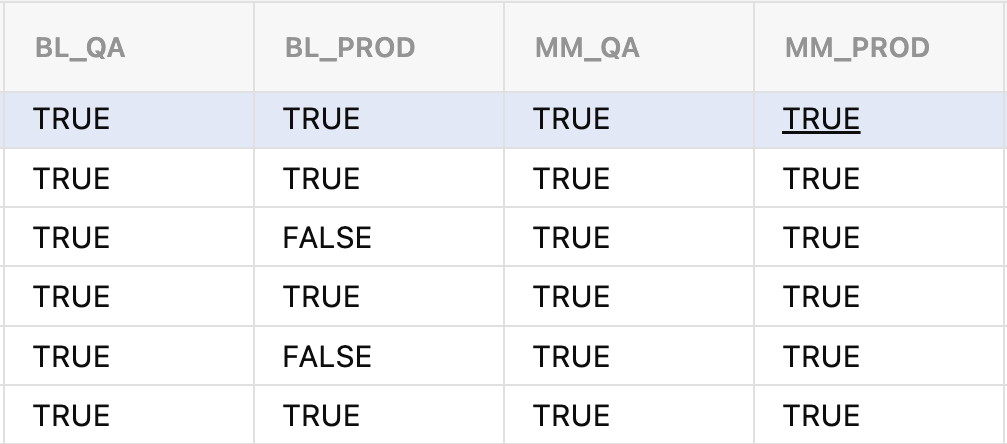
The ‘true’ or ‘false’ field directly controls whether the product is included in the generated file for a specific environment. The customer specifies which environment activates the product.
In the screenshot below, the first two characters indicate the specific service provider (e.g., "BL" for Blue Label, "MM" for Mobile Mart). Everything after the underscore shows the environment represented by the column:

Electrum recommends this naming convention, which enables you to accurately specify the products supported by each partnered service provider, offering precise granularity at the per-provider and per-environment level. You are not required to follow this convention; you may use any naming rule (or convention) that you choose.
Retool displays environments such as QA and Production, and you can select to generate files for these environments; otherwise, it will generate an empty JSON file. For example, all products marked as TRUE in the QA column will be included in the generated JSON files.
Generate and download files
This section explains the Retool functions required to create the final, validated JSON/CSV files.
After validating your new mappings, you must generate the files that the Config App requires to load the new mappings onto the switch.
Select the Environment (e.g., QA or Prod) in which you want to generate files.
Click the Generate Files button.
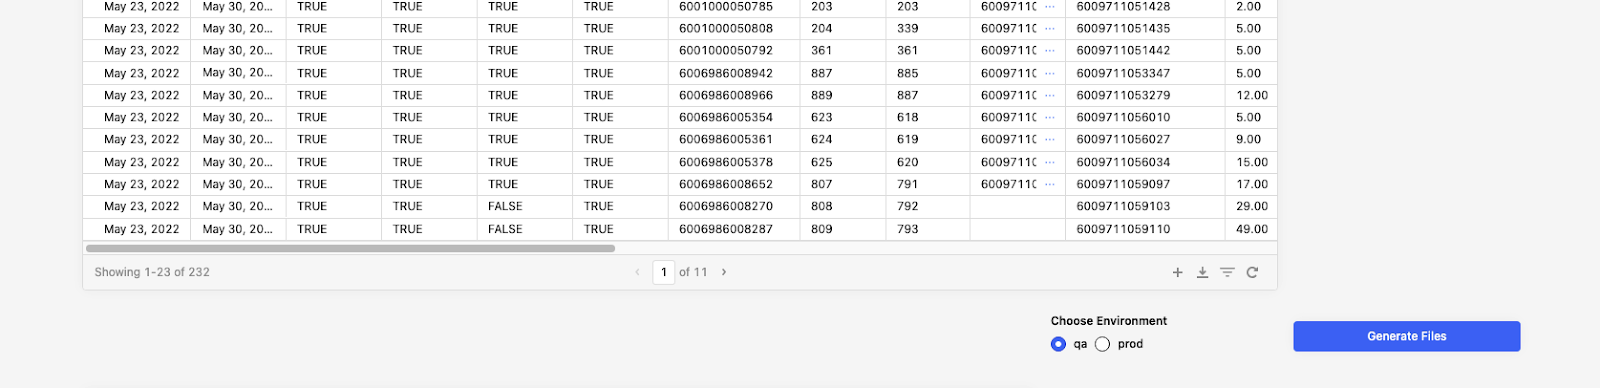
- Depending on the service impacted, the Retool App may output several JSON and/or CSV files. The Biller list creates only a single output.
Upload files to the Configure tab
Navigate to the Config App (Configure).
On your Electrum Console (either Production or Pre-Production, depending on where you are making the changes), navigate to the Configure tab.
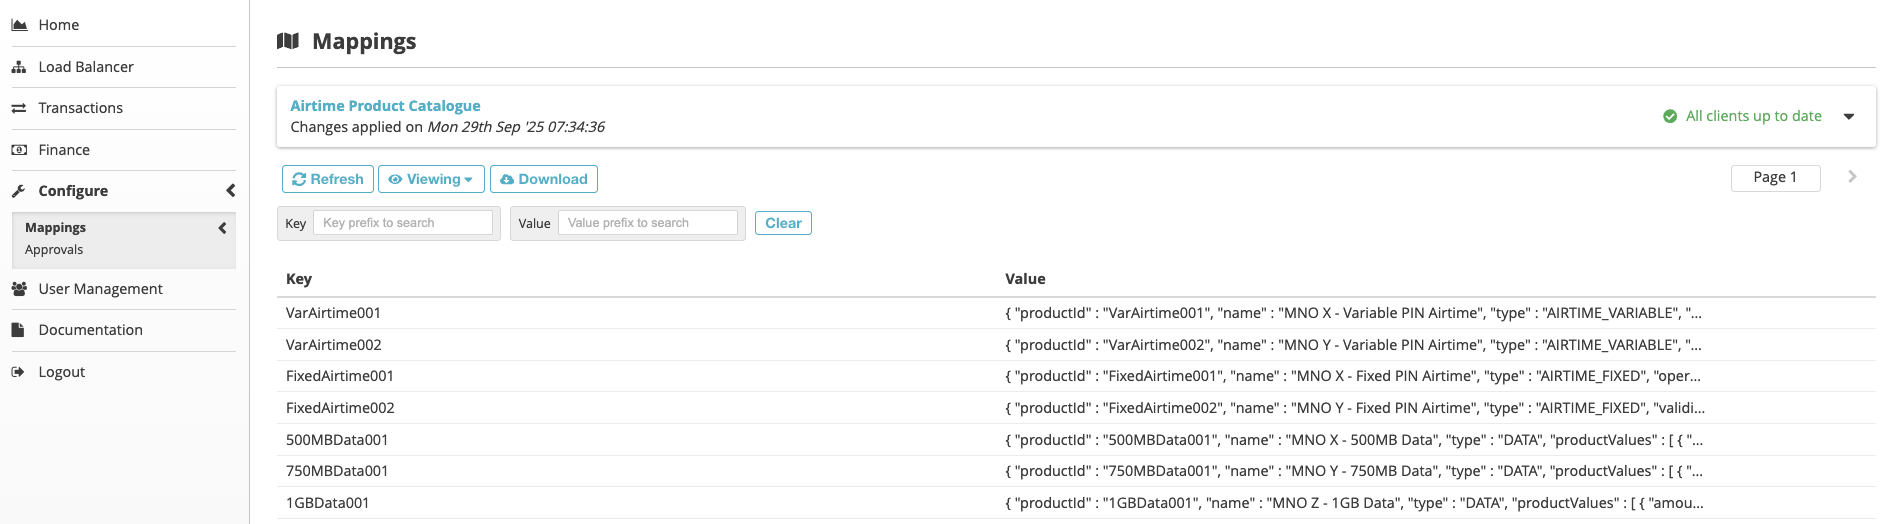
In the Configure section, select Mappings and navigate to the particular mapping that you need to update.
Upload the file (Example: Airtime Product Catalogue Map)
Open the map you wish to update (e.g., Airtime Product Catalogue Map)
Click on the Viewing drop-down and select Editing. This enables you to upload your file.
- Click on Upload File and locate the generated file from Retool on your system. Then, select it to upload (e.g., AirtimeProductCatalogue.json).
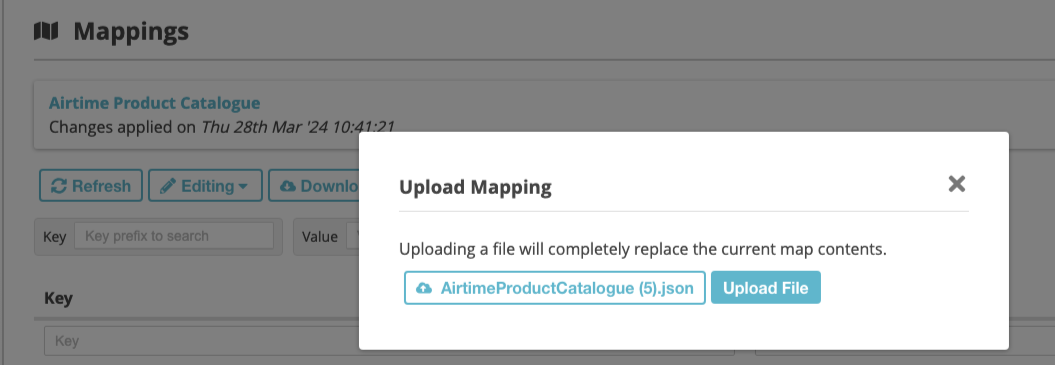
- Click Upload File. Note that uploading a file will completely replace the current map contents.
Review and submit for approval
On the Mappings screen in Edit mode, click Submit.
Enter a comment for the reviewer to see when they review the changes.
Click Okay. The changes will remain visible in Edit mode until the reviewer either applies or rejects the changes.
Click on the View drop-down and select unsubmitted changes to view all the changes made to the map.
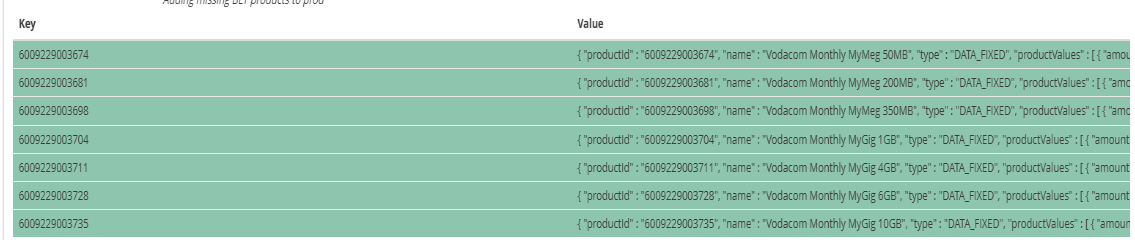
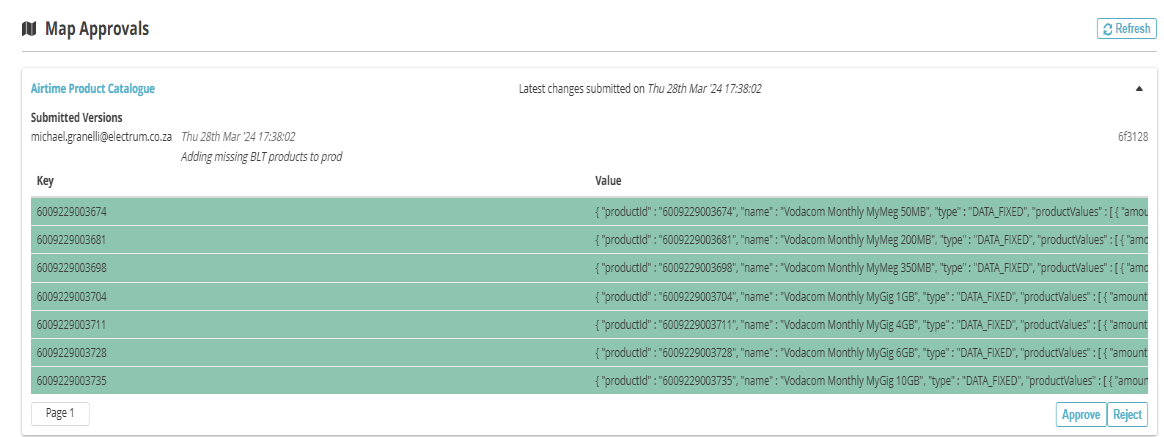
Changes are colour-coded:
| Colour | Description |
|---|---|
| Green | The mapping has been added. |
| Blue | The mapping has been edited and changed. |
| Red | The mapping has been removed. |
See example below:
- Confirm that all changes are correct, then submit for approval. After clicking Submit, you can view the map changes in the Approvals tab under Configure.
Review and Approval Workflow
To ensure accuracy, the process includes a review and approval step. After submitting the necessary change within the Config App, notify the approver so that they can log into the Electrum Console and review the changes before applying or rejecting them.
Any QA changes can be auto-approved. Electrum never approve Production mappings.
Addressing a rejected change
A reviewer who rejects a change must provide an explanation of the reason for the rejection. If your changes have been rejected, return to Retool and resolve the specific issue the reviewer identified. This is crucial as it ensures that Retool is kept up-to-date with what is currently implemented by the Electrum Catalogue. Once you make the change, re-download the newly generated configuration files (both the JSON and CSV formats). Re-upload these new files to the Config App to ensure Retool maintains perfect synchronisation with the recently implemented catalogue.
Product removals
Product removal is the most complex operation and cannot be processed directly through the Retool UI at this time. To remove a product, you must log a request via the Electrum support channel support@electrum.co.za.